Create table with checkbox using Bootstrap
Contents
In this tutorial, we are going to create the basic table with check box using bootstrap. Bootstrap has a set of table classes for creating the responsive table. It includes the classes to style any table.
| Class | Description |
| .table | add basic styles for the data inside the <table> tag |
| .table-bordered | add borders on all side of the table and cells |
| .table-condensed | Makes table more compact by cutting cell padding in half |
| .table-hover | Add hover effects ( (grey background color) on the table rows |
| .table-striped | Add zebra-striping to any table row within the <tbody> |
Step 1: Create a table in Bootstrap
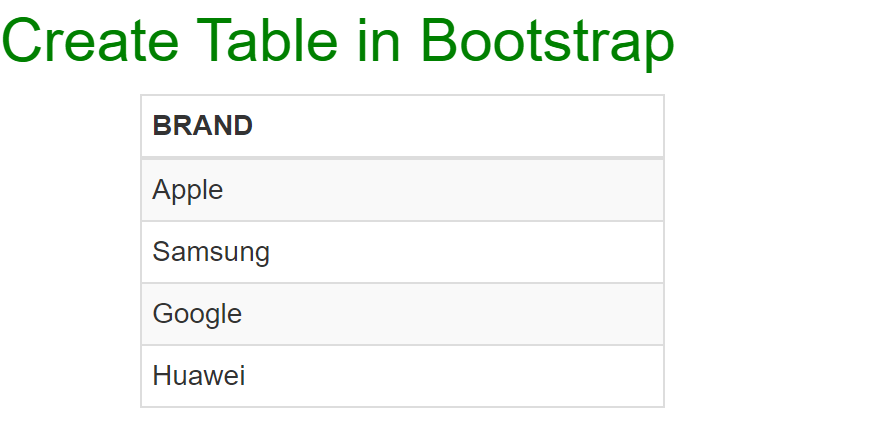
Lets create the table as below. Then we can add the check box on the table rows.
|
1 2 3 4 5 6 7 8 9 10 11 12 13 14 15 16 17 18 19 20 21 |
<table class="table table-bordered table-condensed table-hover table-striped text-center"> <thead> <tr> <th scope="col">BRAND</th> </tr> </thead> <tbody class="text-left"> <tr> <td>Apple</td> </tr> <tr> <td>Samsung</td> </tr> <tr> <td>Google</td> </tr> <tr> <td>Huawei</td> </tr> </tbody> </table> |

Step 2 : Add check box to a table
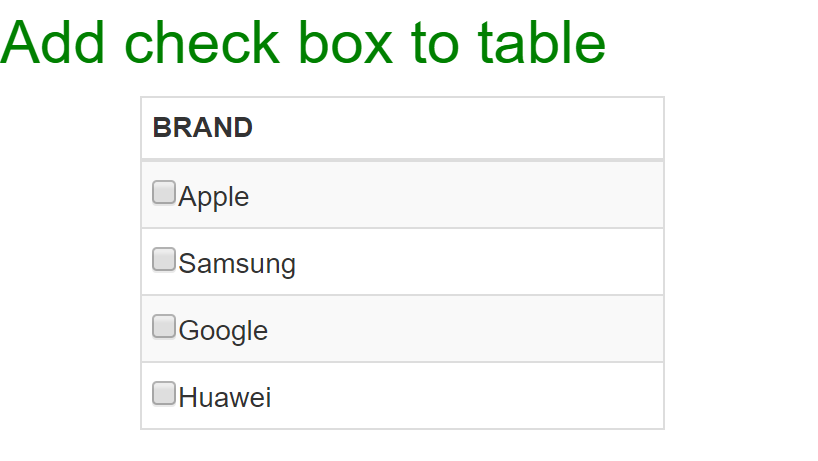
To show the check box before the cell data, we are defining those fields as check box using the below code
|
1 2 3 4 |
<td><input type="checkbox" name="brand">Apple</td> <td><input type="checkbox" name="brand">Samsung</td> <td><input type="checkbox" name="brand">Google</td> <td><input type="checkbox" name="brand">Huawei</td> |

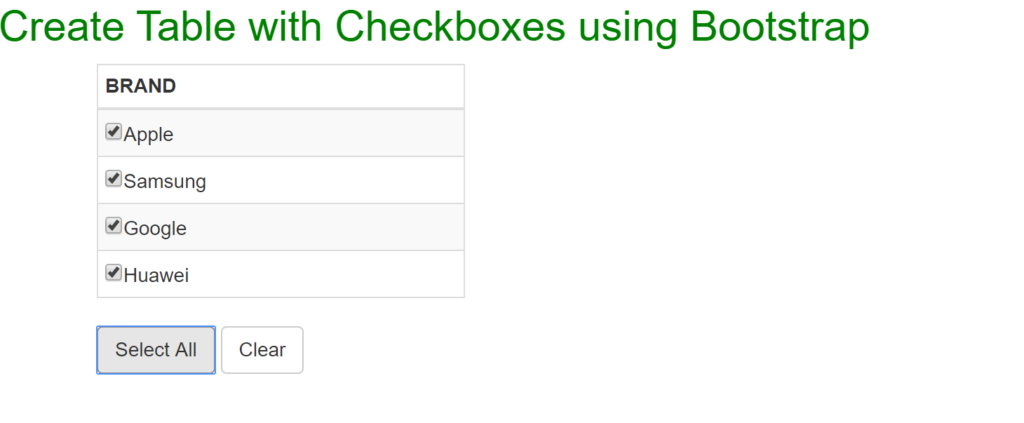
If we have more options in the check box list, we need to add the select all and clear option to improve the user experience.
- Select all – To select all the check boxes
- Clear – To reset all the check boxes.
|
1 2 |
<button type="button" class="btn btn-default">Select All</button> <button type="button" class="btn btn-default">Clear</button> |
Now its time to add the functions to make the action of select and reset the check boxes using buttons. Using the onclick() event of Javascript, we can call our custom functions to complete this functionality.
|
1 2 3 4 5 6 7 8 9 10 11 12 13 14 15 16 17 18 19 20 |
<button type="button" class="btn btn-default" onclick="checkAll()">Select All</button> <button type="button" class="btn btn-default" onclick="uncheckAll()">Clear</button> <script type="text/javascript"> // Select all check boxes : Setting the checked property to true in checkAll() function function checkAll(){ var items = document.getElementsByName('brand'); for (var i = 0; i < items.length; i++) { if (items[i].type == 'checkbox') items[i].checked = true; } } // Clear all check boxes : Setting the checked property to false in uncheckAll() function function uncheckAll(){ var items = document.getElementsByName('brand'); for (var i = 0; i < items.length; i++) { if (items[i].type == 'checkbox') items[i].checked = false; } } </script> |

Custom Javascript functions – checkAll() & uncheckAll()
When user clicks the Select All button, it calls the checkAll function to set the checked property as true for all the check boxes. Similary if user clicks the clear button, it calls the uncheckAll function to reset the checked property as false for all the check boxes.
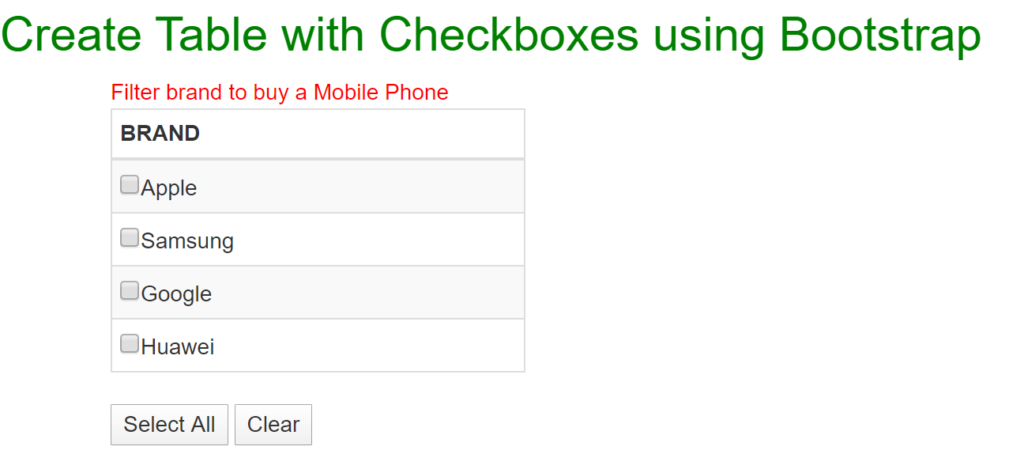
Let put all code together to show our table with check boxes.
Complete code:
|
1 2 3 4 5 6 7 8 9 10 11 12 13 14 15 16 17 18 19 20 21 22 23 24 25 26 27 28 29 30 31 32 33 34 35 36 37 38 39 40 41 42 43 44 45 46 47 48 49 50 51 52 53 54 55 56 57 58 59 60 61 62 |
<!DOCTYPE html> <html lang="en"> <head> <title>Bootstrap Example</title> <meta charset="utf-8"> <meta name="viewport" content="width=device-width, initial-scale=1"> <link rel="stylesheet" href="https://maxcdn.bootstrapcdn.com/bootstrap/3.4.1/css/bootstrap.min.css"> <script src="https://maxcdn.bootstrapcdn.com/bootstrap/3.4.1/js/bootstrap.min.js"></script> </head> <body> <h2 style="color:green">Create Table with Checkboxes using Bootstrap</h2> <div class="container"> <span style="color:red">Filter brand to buy a Mobile Phone</span> <div class="row"> <div class="col-md-3"> <!-- Adding bootstrap table classes to style a table--> <table class="table table-bordered table-condensed table-hover table-striped text-center"> <thead> <tr> <th scope="col">BRAND</th> </tr> </thead> <tbody class="text-left"> <tr> <td><input type="checkbox" name="brand">Apple</td> </tr> <tr> <td><input type="checkbox" name="brand">Samsung</td> </tr> <tr> <td><input type="checkbox" name="brand">Google</td> </tr> <tr> <td><input type="checkbox" name="brand">Huawei</td> </tr> </tbody> </table> <button type="button" value="selectAll" class="main" onclick="checkAll()">Select All</button> <button type="button" value="deselectAll" class="main" onclick="uncheckAll()">Clear</button> </div> </div> </div> <script type="text/javascript"> // Select all check boxes : Setting the checked property to true in checkAll() function function checkAll(){ var items = document.getElementsByName('brand'); for (var i = 0; i < items.length; i++) { if (items[i].type == 'checkbox') items[i].checked = true; } } // Clear all check boxes : Setting the checked property to false in uncheckAll() function function uncheckAll(){ var items = document.getElementsByName('brand'); for (var i = 0; i < items.length; i++) { if (items[i].type == 'checkbox') items[i].checked = false; } } </script> </body> </html> |

Recommended Articles
- Create a responsive login form using Bootstrap
- Create a responsive header for a website using Bootstrap
