
How to import excel data into Teradata table?
Contents
Import data using Teradata SQL Assistant
Teradata SQL assistant is providing the import data option which is used to bring the data into Teradata table from the excel or notepad files.If we want to do any analytics on the excel data, we can use this option to simplify our work.
Set the required import option in SQL assistant
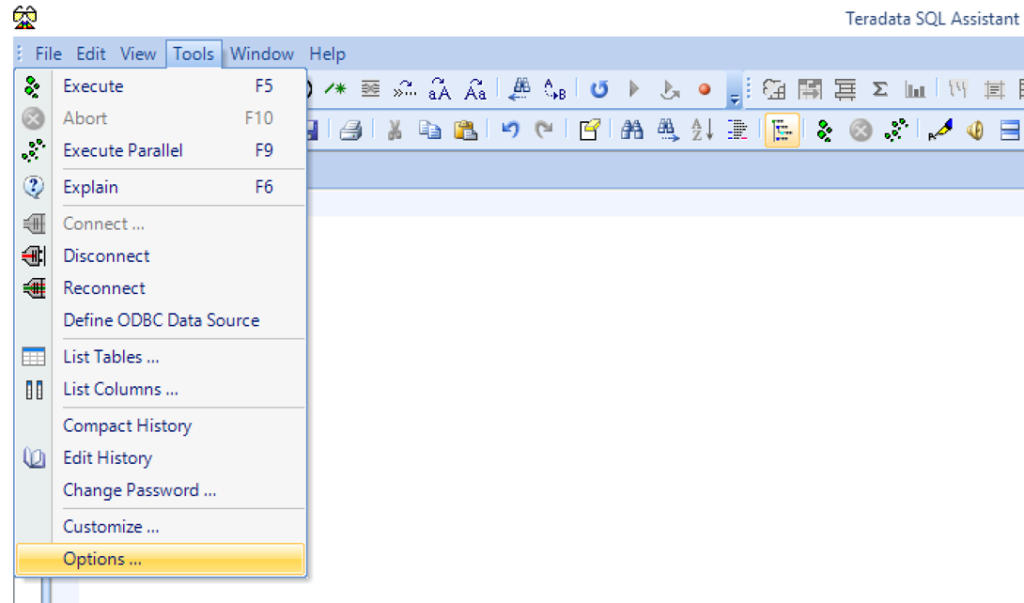
- Go to Tools in menu bar -> Click Options -> Export/Import
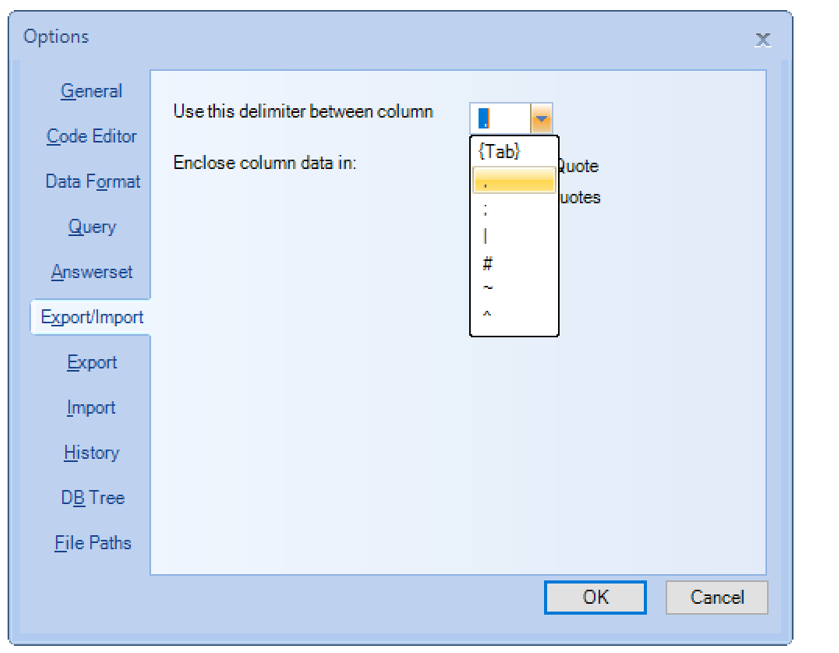
- The importing excel file should have the delimiter to split the column values. We have to select that delimiter character in the drop down option. Here we have selected the comma(,) as a delimiter for importing file.
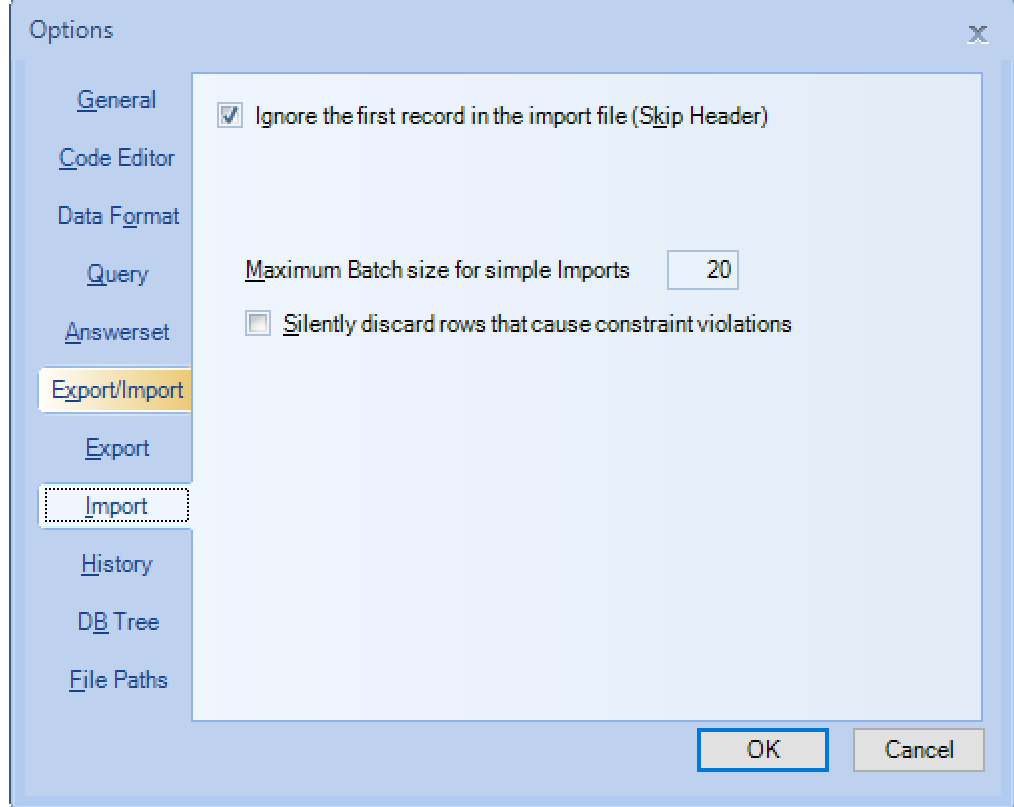
- Select Import option to set the Skip header option if you have header record in the importing file.
Import the excel data into Teradata
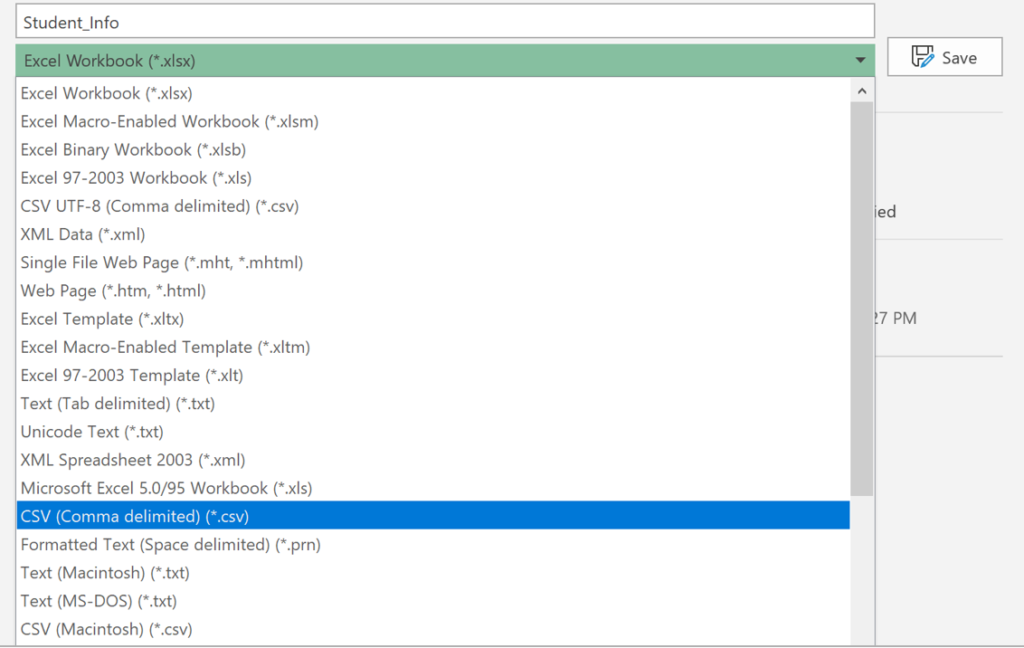
Step 1 – The excel file should be in the format of .csv to begin the import operation. To do that, Just open your excel file and click “Sava as” in the File menu. Then Select the CSV (Comma delimited) (*.csv) from the drop down and save that file.
- Step 2 – Create the Teradata table with the required columns in Sql assistant so that we can import the excel data into that table.
|
1 2 3 4 5 6 7 8 9 |
CREATE SET TABLE College_DB.Student_Details, FALLBACK ( StudentId INTEGER, FirstName VARCHAR(30), LastName VARCHAR(30), Course VARCHAR(40) ) UNIQUE PRIMARY INDEX ( StudentId ); |
- Step 3 – Prepare the insert query with the question marks in the position of column name. While we run the query using import option in sql assistant, the question marks will be replaced with the values.
|
1 2 3 |
Insert into College_DB.Student_Details values (?,?,?,?); |
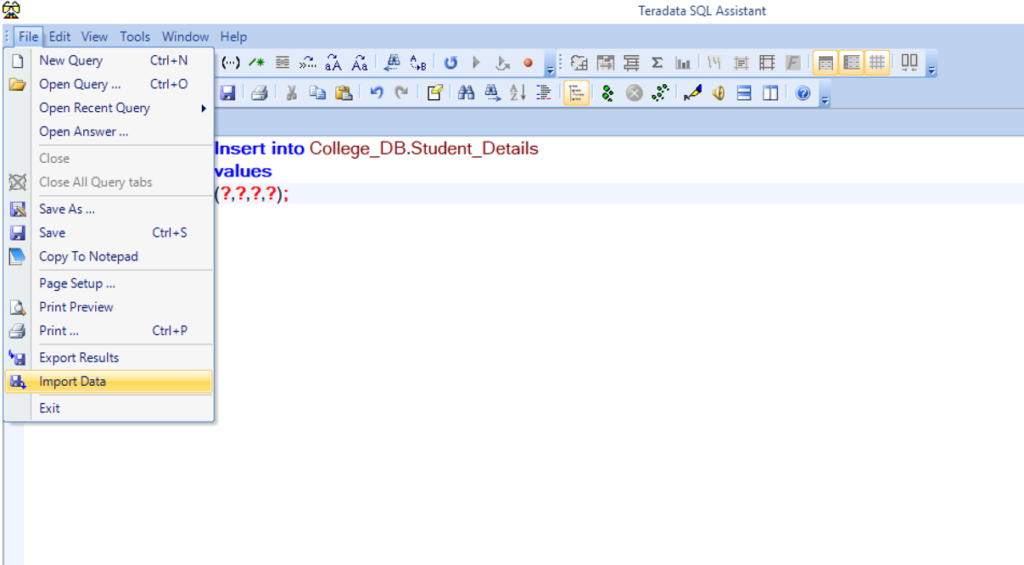
- Step 4 – In the SQL assistant, select the Import Data option from the File Menu which will make the application in Ready for Import operation state.
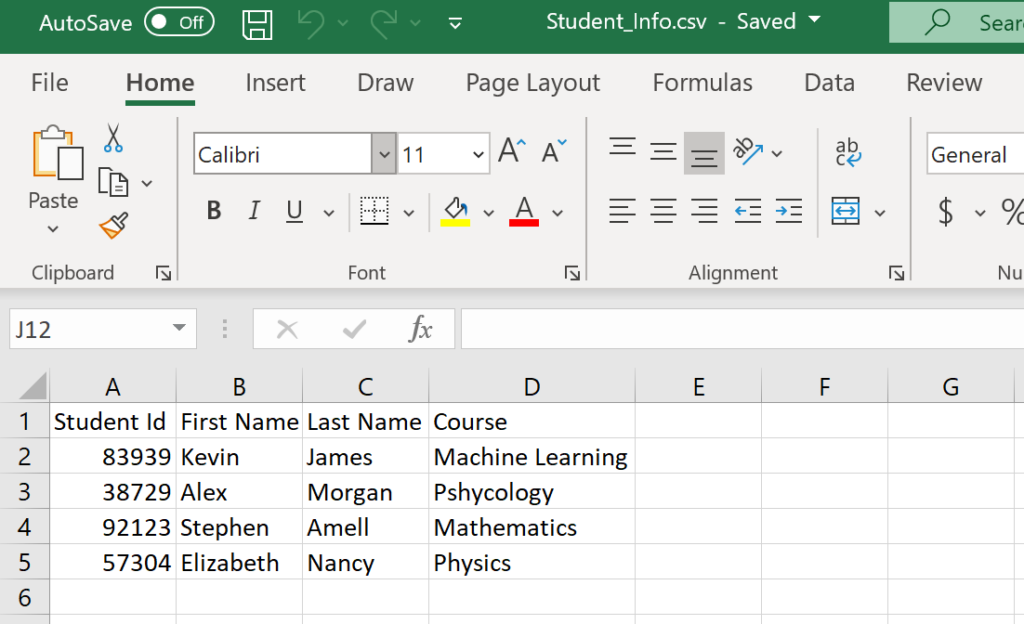
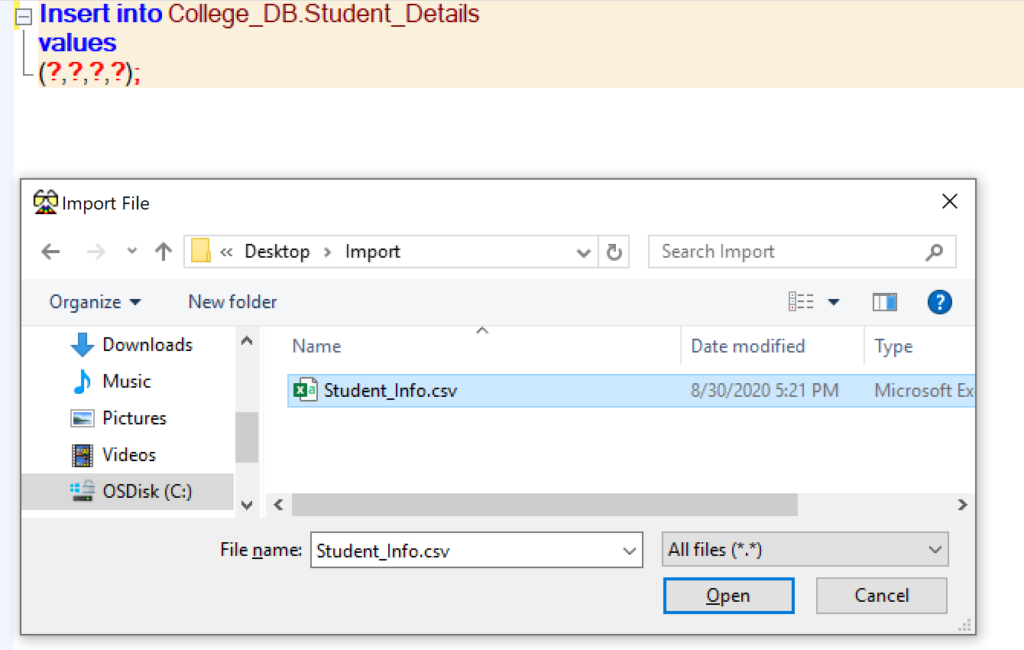
- Step 5 – Execute the Insert query by pressing F5 or tool bar option which will ask the location of the Import File to begin the loading. Just select the .csv file that has the required data. Here we are selecting the “Student_Info.csv” file to import the excel data into Teradata table.
- Step 6 – Then the importing will begin in the sql assistant and we can see the successful message as ” Import complete. <number> records imported” at the bottom. If something wrong in the insert query or file, it will throw an error message.
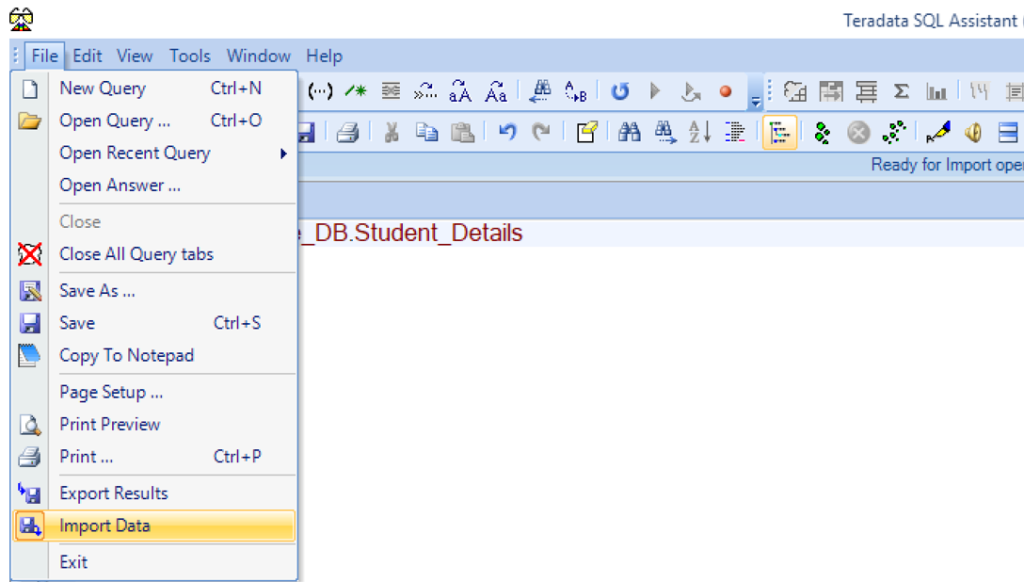
- Step 7 – Finally we have to stop the Import operation by clicking Import data from the File menu. Otherwise the sql assistant will be in the import state only.
Lets look at the Student_Details table to see the imported records. As you can see below, we have successfully imported all the records from the excel (.csv) file into Teradata Table.

Recommended Articles
Export Teradata table to a file using BTEQ